The making of a Game Boy Color game in 2019 – from zero to physical
December 12, 2019 • 15 minute read
We all know that making a video game today poses little to no constraints in terms of what you can do. Game engines like Unity and Unreal lift a lot of the heavy load for us, allowing us to focus on actually designing and making games. But what was it like in the 90s? That’s what I set out to discover in late-2018 when I came across the “Ultimate Game Boy Talk”, which by itself was able to plant in my brain the crazy idea of developing games for the most iconic console out there: the Game Boy. As a gamer and collector, the idea of creating games for a console that I spent so many hours playing as a kid was amazing.
I soon realized that if I was going through with this, my options were limited to learning Assembly, the language of the programming Gods, or learning C and use the Game Boy Development Kit – a set of tools developed and maintained by the homebrew community. Since up until that point I had had no contact with low level languages before, I decided to pick GBDK and learn C as I went along. With a set of tools and a lot of motivation, the next step was find out what a Game Boy could do.
So what can a Game Boy do?
Before planning a game, it was important to first understand what the Game Boy hardware (and by association the Game Boy Color) could do. Here’s a quick rundown of the capabilities that I took note at the time:
- 2.2″ screen (2.6″ for the DMG) with 160×144 px resolution;
- 3 available layers – a scrollable tile-based background layer, an object layer (known today as the sprite layer) and a window layer drawn to the screen in that order;
- Each sprite or background tile can only contain up to 4 colors (2 bit), being one of them used for transparency in case of sprites – on the Game Boy Color each sprite can have it’s own color palette instead of sharing the same 4 shades of green;
- There’s a limitation of 10 sprites per horizontal line, and 40 simultaneous sprites on screen. Sprites are limited to 8×8 or 8×16 pixels in size, setting to one mode or the other affects all sprites in the game;
- Mono speaker, stereo headphone jack;
- 4 available sound channels: 2 square wave channels, an arbitrary wave channel and a noise channel;
- ROM size limited to 32KB before needing to implement ROM banking and switching;
- Draw order of sprites is based on their position in the Sprite Attribute Table (OAM) – on the original Game Boy, the sprite with the lowest x coordinate is drawn on top;
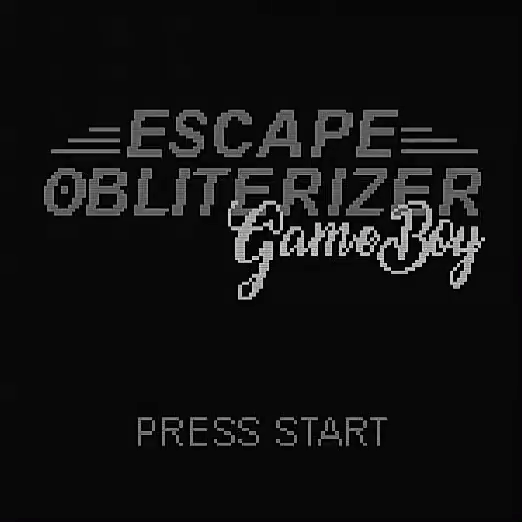
With all of that in mind, what game would I do? A lot of experienced developers recommend starting by remaking old classics like Pong, Snake or Tetris because while simple in scope, they’re good enough to teach anyone the basics of programming for a certain system. In my case, I decided to take one of the games that I had worked on previously and completely remake it for the Game Boy Color. That game was Escape Obliterizer, an endless running game I had worked on (with two friends) during a 48-hour hackathon.
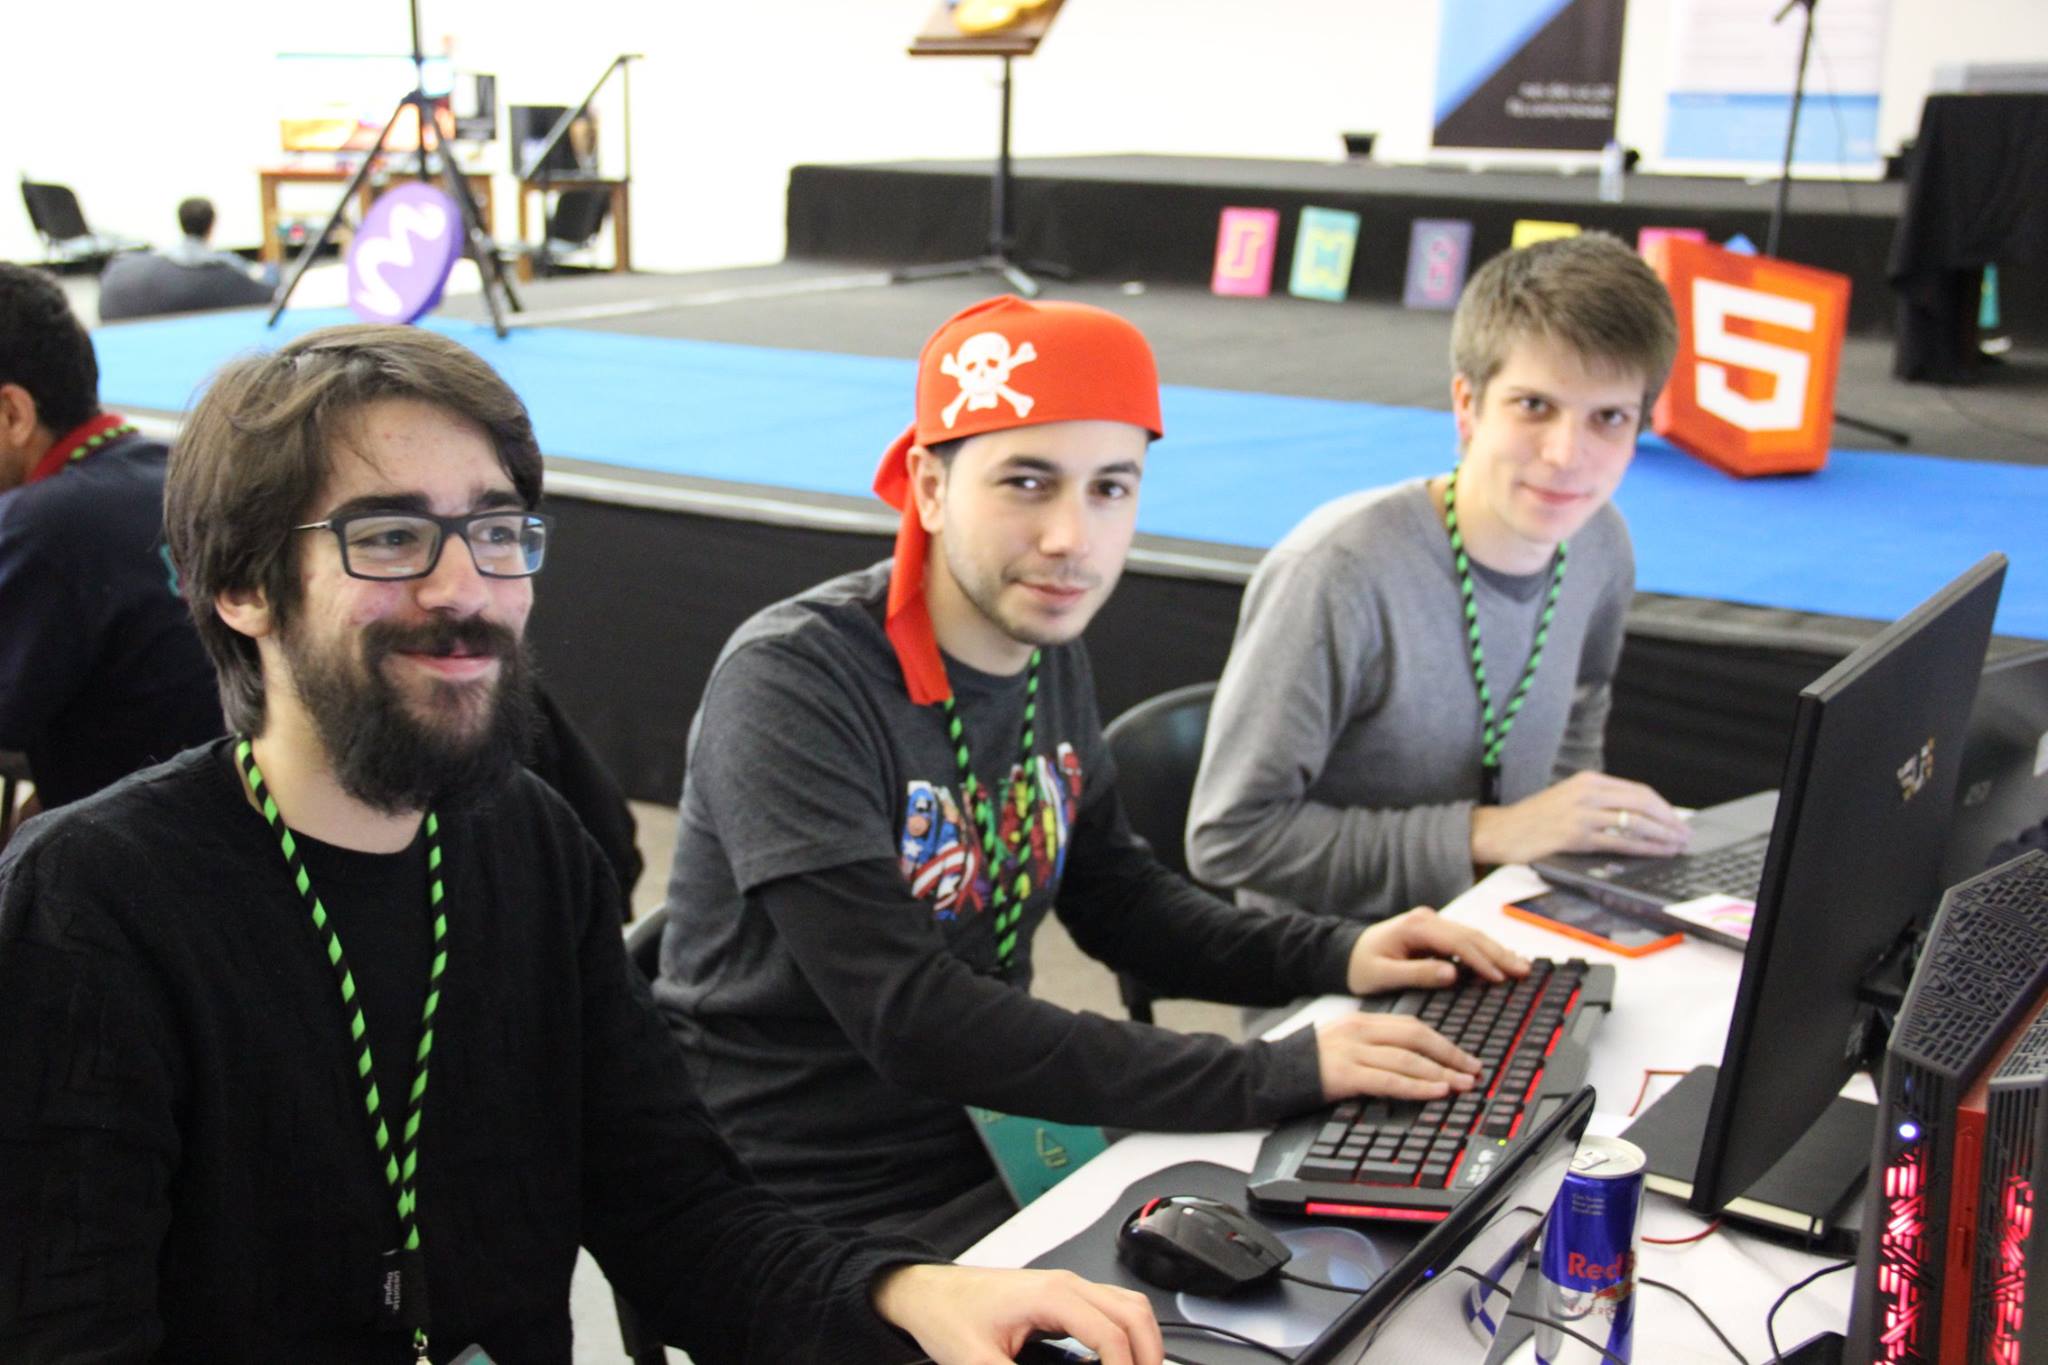 Me, Marco and Eduardo at Shift APPens 2016
Since all of us at the time had a big passion for video games but very little programming experience, we designed it to be mechanically and graphically simple so we could actually finish it on that short time frame. Because of that, and despite its overly simplistic design, it made it a perfect fit for the Game Boy Color experience! Well, almost…
Original game and required changes
In terms of gameplay there were little to no changes, just overall improvements. In the original game you play as a green square stuck to the middle of the screen that can move into one of four other positions: up, right, down or left. While holding a directional key, you move to the corresponding position until you release it and/or press a new directional key. There are several hazards going off randomly that target different positions and that you must avoid for as long as you can. The longer you stay alive, the higher the score.
Something that we failed to implement in the original game was a level system or a way of incrementing difficulty over time. Basically, all hazards just fired randomly with very little care to how long the player had been playing, making the game sort of stale after a while. For the Game Boy Color remake, I decided I would make it progressively difficult as time went on, becoming so fast at the end it would be almost impossible to dodge (probably inspired by the infamous Tetris kill screen). To give a reason for the player to move, I also decided to award more score per second while the player is overlapping one of the diamond-shaped bases. While it might be subtle, if you play it for a while you’ll eventually pick it up.
In terms of sound, the original game only had a drum beat playing in the background and several sound effects for the different hazards. Given the Game Boy hardware, these would all have to be remade from scratch no matter what, to fit the four available sound channels mentioned above. At first glance, not very problematic. For the music I would use OpenMPT to transcribe the original beat and GBT Player to convert the .MOD file to C code and play it in GBDK. For the sound effects, and after messing around with the available sound registers, they wouldn’t be very hard to replicate.
When it comes to graphics, even though the original sprites were everything but pixel perfect, they were simple enough to pass for Game Boy graphics. That said, I just had to redesign all the the original sprites and background using GBTD and GBMD (Tile Designer and Map Designer respectively) so I could have them all ready and available as C code. Since the original player sprite didn’t look as good in such small size, I took the liberty to design a completely new player sprite that I would see fit for the Game Boy remake.
Actual development, drawbacks and optimizations
Developing a prototype with working game states – menu, gameplay loop and game over screen – was simpler than I expected. After having most of the sprites and background translated into C code I could use, all I had to do was process the player’s input and write basic hazard triggering logic. Since the player positions are fixed beforehand, there’s no need for pixel-by-pixel collision checking or anything fancy: while the player moves freely, whenever a laser or bomb goes off, the player is stuck in the current position until the hazard animation is over. If the player is in a position occupied by the said hazard at the time of explosion, the player dies.
 A very early prototype of the game in four shades of grey
Here’s how everything worked so far: the diamond shaped bases and all the UI – score and debug variables – are drawn in the background layer since it’s ok for everything else to overlap them. All the sprites are drawn to the object layer, the player sprite being placed as further in OAM as possible (sprite number 39), so all other sprites can appear on top of it (only true on the Game Boy Color). The vertical laser we see there, is just a set of nine 8×16 pixel-sized sprites displayed to look like a vertical line – the image data is loaded once and reused by all the sprites simultaneously.
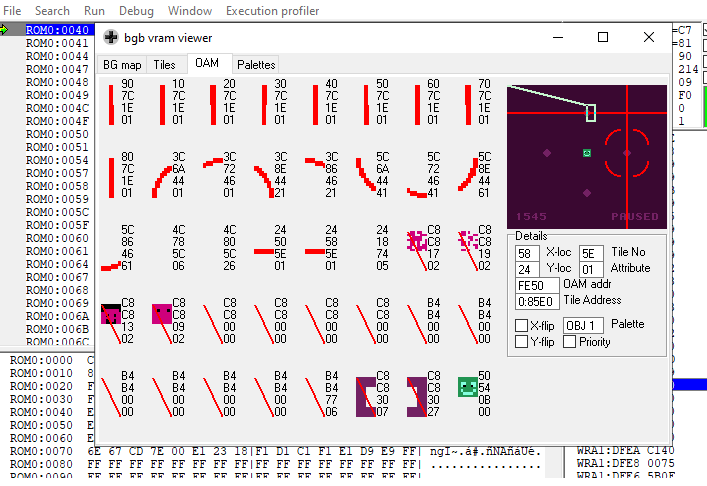
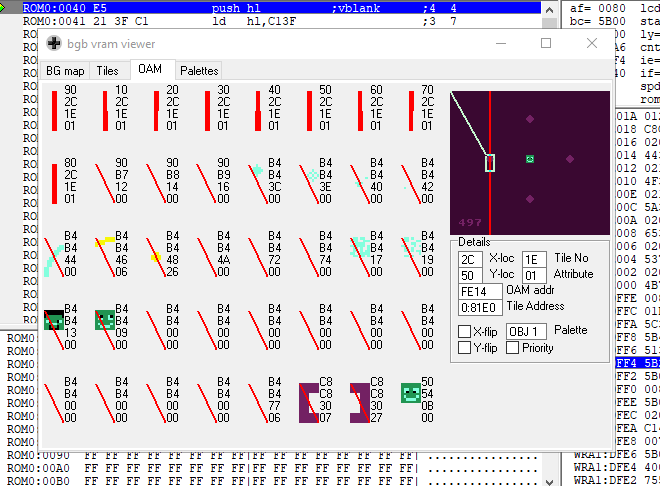 Ispecting the vertical laser on OAM
While drawing the vertical laser using sprites posed no problems, drawing the horizontal laser wouldn’t be as simple. If you’ve been reading attentively, you might recall that there is a 10 sprite per line limitation, and since one sprite can only be as wide as 8 pixels, it’s virtually impossible to fill the entire width of the screen with sprites without having some of them vanishing. Even though it’s possible nowadays to remove this limitation using emulators, it wouldn’t work on original hardware, so I had to work around it. After fiddling around with different ideas, I realized I could use a mix of both background tiles and sprites to create the desired effect: in the background layer, I would draw a line of laser tiles to fill the entire width (always careful to also draw alternative diamond-shaped tiles so it would look like they’re being overlapped as well) and in the sprite layer, in the positions the player could reach, I would simply draw two laser sprites so the player would also appear to be overlapped by something that’s actually going on in the background.
 Ispecting the horizontal laser on OAM
While quite ingenious, it works pretty well. What doesn’t work pretty well is animating background tiles the same way as animating sprites and expect the same speed. Well, no problem. Instead of trying to animate it the same way, just turn it into an horizontal laser shot instead.
With that out of the way, there was only one hazard missing, the bomb. While in the original game the bomb laser is a perfect circle, in the remake I decided to draw it more like a round-cornered square, to avoid the exact same problems I described above. With that change, it became relatively easy to implement since by that time, I was already familiar with the some of the nooks and crannies of developing for the Game Boy.
By the time the bomb was implemented, the game was pretty much finished gameplay-wise. The only thing missing was the music. While I was trying to optimize both the code and assets as best as I could, my own inexperience blinded me to the fact that implementing the background music using the GBT player would eat up almost an entire ROM bank, and that’s not even accounting for the actual music data. This means that no matter the optimizations I did, it would never fit the 32KB ROM space and that I would have to rewrite a big chunk of the code to work with ROM banking and switching. That said, I just decided I wouldn’t mind it not having any music, given it already had all the sound effects working nicely.
Final touches and making the best out of 32KB
While the music wouldn’t fit the 32KB, I still had some space left on the ROM so I just started polishing everything and adding new stuff wherever I could: I redesigned the main menu and game over screens, added a credits screen, added highscore saving functionality (for emulators and cartridges with batteries) and most importantly, added a cheat code into the game! If you read the credits, it will instruct you to input a special code in the menu that will unlock a new screen, in which you can choose the player skin you want to play with. We had this planned as feature for the original game but we never added it in due to time constraints. I thought it would be a good touch to add that in.
When developing games it’s easy to get caught in feature creep – wanting to add more and more features to your game, delaying its release indefinitely. This time though, that was hardly the case. The moment the compiler started complaining about bank overflows, it was time to stop and by then, the game was finished.
Testing and bug stomping
Testing the game was a fairly simple process. Besides testing on original hardware – Game Boy Color and Game Boy Advance – using an EVERDRIVE, I also tested it on a bunch of different emulators for different platforms (Master Boy for the PSP, BGB for Windows, VisualBoyAdvance for Windows, VaporBoy for the Web, etc). While testing it myself proved to be a fruitless effort (since I found little to no bugs) I also released a build on my Instagram account which, with as little as 100 followers, was able to generate a couple of bug reports:
- The colors were too dark on non-backlit screens – leading me to release an alternate version with adapted colors for non-backlit screens for the true retro experience;
- The score stopped counting during animations – which was promptly fixed;
- Playing without a battery and saving highscores, produced funnily huge highscores – which I dediced to keep in because why not?
Going physical!
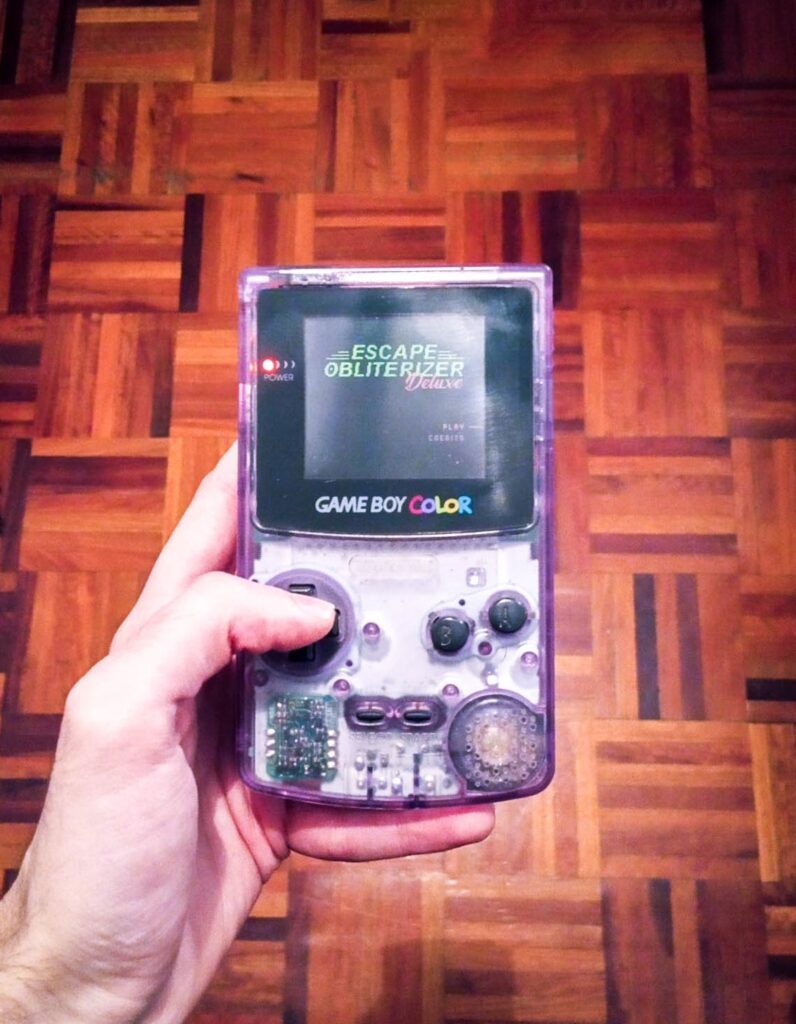
Besides the code constraints, there’s another reason why staying under 32KB was important to me. When the game was finished I wanted to produce some physical cartridges with the actual game! The cheapest way I could do that myself was to get a bunch of bunch of Chinese bootlegs off Ebay, buy a cartridge flasher (a GBxCartRW in this case) and flash my own ROM into them. With that in mind, I just mocked up a label for the cartridge and ordered the required parts. After weeks of waiting for everything to arrive, I eventually made three high-quality cartridges (one for myself and one for each of my friends who had worked on the original game with me) with transparent cases – like a true Game Boy Color specific game should be – and a few low-budget cartridges with chinese hardware to giveaway to friends and friends of friends. Here’s how those efforts turned out:
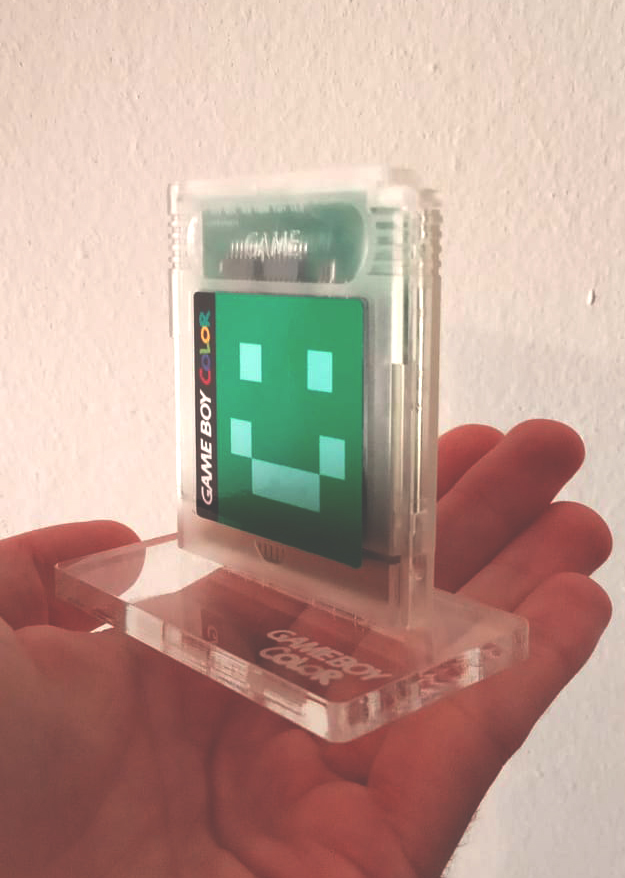 My own copy on a beautiful translucent stand
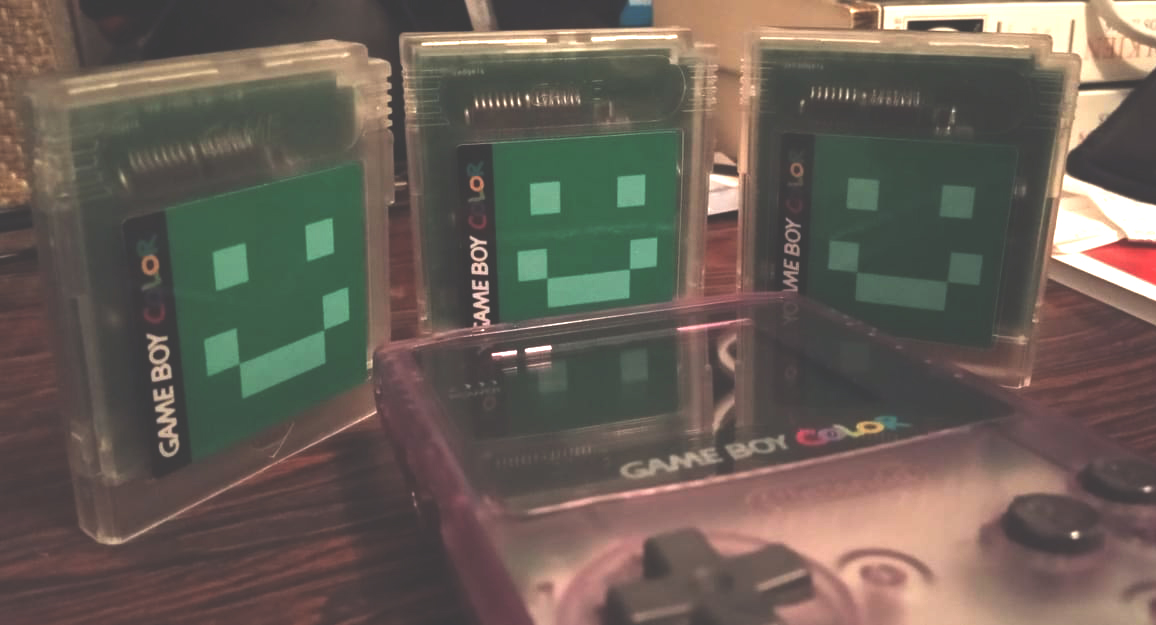 The original three copies made on translucent shells
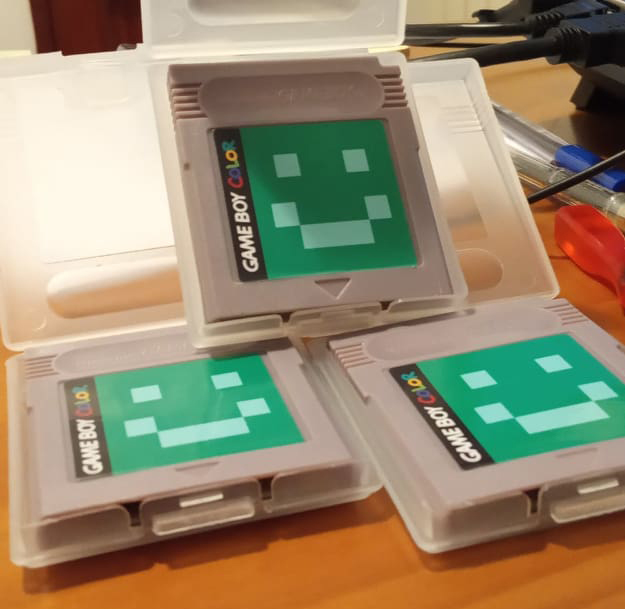 Several carts in grey to distribute between friends
Release, reception and wrapping up
With the game finished, I just posted the code up on my Github (definitely not my best code but good enough if you’re a newbie and would like to learn the basics) and posted the ROM to itch.io and romhacking.net where you can download and play it yourself. In a twisted turn of events, Johnny Retro from the Retro Raider show also got one of my prototype cartridges and ended up making a video about it, feel free to check it out and spread the love!
I’m a big proponent of the idea that not every game has to be a best-seller so it shouldn’t come as a surprise when I say that while not a very impressive game by any means, it was a game I definitely enjoyed working on. It’s also pretty obvious that everyone who came in contact with it in a way or another got to enjoy it as well and most of the times having your peers validating and appreciating your work is greater than 1 million anonymous downloads.